
OAuth是一个关于授权(authorization)的开放网络标准,在全世界得到广泛应用,目前的版本是2.0版。至于为什么要采用OAuth 2.0授权标准,飘易说几家大家耳熟能详的公司就好了,新浪微博、腾讯qq、微信公众号、淘宝等等,它们对外提供API服务几乎都采用oauth 2.0标准。
好了,本文飘易以你已经安装或打算安装以下几个应用的基础上展开来说的:laravel 5.1、oauth 2.0、dingoapi。其中oauth的源地址:https://github.com/lucadegasperi/oauth2-server-laravel;dingo api的源地址是:https://github.com/dingo/api。
composer.json配置文件里添加:
"require": {
        "php": ">=5.5.9",
        "laravel/framework": "5.1.*",
        "dingo/api": "1.0.*@dev",
        "lucadegasperi/oauth2-server-laravel": "5.1.*"
    },
然后执行 composer update 更新获取这2个包。
打开 config/app.php 里 providers 添加:
//Dingo Api Provider
Dingo\Api\Provider\LaravelServiceProvider::class,

//Application Service Providers
...

//OAuth2 Service Provider
App\Providers\OAuthServiceProvider::class,
LucaDegasperi\OAuth2Server\Storage\FluentStorageServiceProvider::class,
LucaDegasperi\OAuth2Server\OAuth2ServerServiceProvider::class,
请注意
Dingo\Api\Provider\LaravelServiceProvider::class,
这个provider的位置,根据dingoapi的文档它必须放在application providers的前面。另外 App\Providers\OAuthServiceProvider::class 这个provider是要自己建立的,文档参考https://github.com/dingo/api/wiki/Authentication#oauth-20:
OAuthServiceProvider.php文件内容如下:
<?php

namespace App\Providers;

use Dingo\Api\Auth\Auth;
use Dingo\Api\Auth\Provider\OAuth2;
use Illuminate\Support\ServiceProvider;

class OAuthServiceProvider extends ServiceProvider
{
    public function boot()
    {
        $this->app[Auth::class]->extend('oauth', function ($app) {
            $provider = new OAuth2($app['oauth2-server.authorizer']->getChecker());
            $provider->setUserResolver(function ($id) {
                // Logic to return a user by their ID.
                return \App\User::find($id);
            });
            $provider->setClientResolver(function ($id) {
                // Logic to return a client by their ID.
                return \App\Models\OauthClient::find($id);
            });
            return $provider;
        });
    }

    public function register()
    {
        //
    }
}
aliases 里添加:
//OAuth2 Server
'Authorizer' => LucaDegasperi\OAuth2Server\Facades\Authorizer::class,
app/Http/Kernel.php 文件里 $middleware 添加1个全局中间件:
//OAuth2 Server
\LucaDegasperi\OAuth2Server\Middleware\OAuthExceptionHandlerMiddleware::class,
$routeMiddleware 里添加5个路由中间件:
//csrf
'csrf' => \App\Http\Middleware\VerifyCsrfToken::class,
//OAuth2 Server
'oauth' => \LucaDegasperi\OAuth2Server\Middleware\OAuthMiddleware::class,
'oauth-user' => \LucaDegasperi\OAuth2Server\Middleware\OAuthUserOwnerMiddleware::class,
'oauth-client' => \LucaDegasperi\OAuth2Server\Middleware\OAuthClientOwnerMiddleware::class,
'check-authorization-params' => \LucaDegasperi\OAuth2Server\Middleware\CheckAuthCodeRequestMiddleware::class,
对于laravel5的csrf问题,有以下2个解决方案:
方案一:app\Http\Middleware\VerifyCsrfToken.php 里把 oauth开头的路由例外:
protected $except = [
    'api/*',
    'oauth/*',
    ];
方案二:把 App\Http\Middleware\VerifyCsrfToken 从全局中间件$middleware 移除,然后把它放入到 $routeMiddleware 里面,比如: 'csrf' => App\Http\Middleware\VerifyCsrfToken::class, 这个时候就需要手动的把csrf middleware加入到需要csrf保护的路由里了!
飘易目前是采用的方案一,因为项目中除了API接口外,还有其他web端的路由需求。
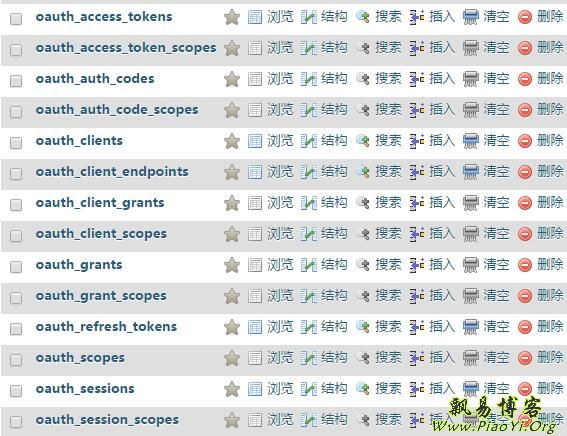
然后执行 php artisan vendor:publish 去发布包的配置和迁移文件migrations,再执行迁移命令:
php artisan migrate
这个时候,我们的数据库里就会生成14张以oauth开头的表了,如下图:
好,我们来配置 config/oauth2.php:
    'grant_types' => [
        //授权码模式
        'authorization_code' => [
            'class' => '\League\OAuth2\Server\Grant\AuthCodeGrant',
            'access_token_ttl' => 3600,
            'auth_token_ttl'   => 3600
        ],
        //密码模式
        'password' => [
            'class' => 'League\OAuth2\Server\Grant\PasswordGrant',
            'access_token_ttl' => 3600,
            'callback' => 'App\Http\Controllers\Api\V1\VerifyController@verify'
        ],
        //客户端模式
        'client_credentials' => [
            'class' => '\League\OAuth2\Server\Grant\ClientCredentialsGrant',
            'access_token_ttl' => 3600
        ],
        //刷新令牌
        'refresh_token' => [
            'class' => '\League\OAuth2\Server\Grant\RefreshTokenGrant',
            'access_token_ttl' => 3600,
            'refresh_token_ttl' => 36000
        ]
    ],
oauth2-server-laravel 这个包支持以上4种方式,不支持简化模式Implicit grant,因为这种模式是授权码模式的一个简化,即使真的要使用简化模式也要把 access token 当做 “public knowledge” (比如 public RSA key) 并且严格限制这种授权模式下的权限。
对于密码模式,有一个回调callback验证用户的登录信息是否正确:
VerifyController.php文件内容如下:
<?php

namespace App\Http\Controllers\Api\V1;

use Illuminate\Http\Request;
use Auth;
use App\Http\Requests;
use App\Http\Controllers\Controller;

class VerifyController extends Controller
{
    public function verify($username, $password)
    {
    	$credentials = [
		 'username' => $username,
		 'password' => $password,
		];

		if (Auth::once($credentials)) {
			return Auth::user()->id;
		} else {
			return false;
		}
	}

}
app\Http\routes.php路由文件中添加以下响应oauth的路由:
/**
 * OAuth
 */
//Get access_token
Route::post('oauth/access_token', function() {
	return Response::json(Authorizer::issueAccessToken());
});
//grant type: authorization code GET
Route::get('oauth/authorize', ['as' => 'oauth.authorize.get', 'middleware' => ['check-authorization-params', 'auth'], function() {
	$authParams = Authorizer::getAuthCodeRequestParams();
	$formParams = array_except($authParams,'client');
	$formParams['client_id'] = $authParams['client']->getId();
	$formParams['scope'] = implode(config('oauth2.scope_delimiter'), array_map(function ($scope) {
	   return $scope->getId();
	}, $authParams['scopes']));
	return View::make('oauth.authorization-form', ['params' => $formParams, 'client' => $authParams['client']]);
}]);
//grant type: authorization code POST //
Route::post('oauth/authorize', ['as' => 'oauth.authorize.post', 'middleware' => [ 'csrf', 'check-authorization-params', 'auth'], function() {
    $params = Authorizer::getAuthCodeRequestParams();
    $params['user_id'] = Auth::user()->id;
    $redirectUri = '/';
    // If the user has allowed the client to access its data, redirect back to the client with an auth code.
    if (Request::has('approve')) {
        $redirectUri = Authorizer::issueAuthCode('user', $params['user_id'], $params);
    }
    // If the user has denied the client to access its data, redirect back to the client with an error message.
    if (Request::has('deny')) {
        $redirectUri = Authorizer::authCodeRequestDeniedRedirectUri();
    }
    return Redirect::to($redirectUri);
}]);

// 回调测试
Route::get('cb', 'Front\IndexController@oauth_callback');
配合路由
Route::get('oauth/authorize'...对应的视图:resources\views\oauth\authorization-form.blade.php 内容如下:
<h2>{{$client->getName()}}</h2>
<form method="post" action="{{route('oauth.authorize.post', $params)}}">
  {{ csrf_field() }}
  <input type="text" name="client_id" value="{{$params['client_id']}}">
  <input type="text" name="redirect_uri" value="{{$params['redirect_uri']}}">
  <input type="text" name="response_type" value="{{$params['response_type']}}">
  <input type="text" name="state" value="{{$params['state']}}">
  <input type="text" name="scope" value="{{$params['scope']}}">

  <button type="submit" name="approve" value="1">Approve</button>
  <button type="submit" name="deny" value="1">Deny</button>
</form>
配合路由(注意该路由是模拟客户端发起POST请求用的,实际这一步对用户来说应该是无感知的,客户端服务器后台利用CURL直接向认证服务器POST)
Route::get('cb', 'Front\IndexController@oauth_callback');对应的视图resources\views\oauth\oauth-callback.blade.php内容:
<h2>我是客户端:提交申请access token</h2>
<form method="post" action="oauth/access_token">
	<input type="text" name="grant_type" value="authorization_code">
  	<input type="text" name="client_id" value="f3d259dd...">
  	<input type="text" name="client_secret" value="4c7f6f8fa93d...">
  	<input type="text" name="redirect_uri" value="http://huishan-park.dev/cb">
  	<input type="text" name="code" value="{{$code}}">
	<button type="submit">GET access token</button>
</form>
对于 dingoapi 部分的演示路由如下:
/**
 * Dingo Api
 */
$api = app('Dingo\Api\Routing\Router');

//Show user info via restful service.
$api->version('v1', ['namespace' => 'App\Http\Controllers\Api\V1'], function ($api) {
    $api->get('user', 'UserController@index');
    $api->get('user/{id}', 'UserController@show');

    // 新组别 need authentication 要验证权限
    $api->group(['middleware' => ['api.auth']], function ($api) {
    	$api->get('time', function () {
        	return ['now' => microtime(), 'date' => date('Y-M-D',time())];
    	});
    });
});
下面就来测试 oauth 吧,先手工在数据库表里添加一个客户端client。表oauth_clients:

表oauth_client_endpoints 配置对应的回调url:

---------------------------------
【authorization code授权码模式】:
1:GET
http://huishan-park.dev/oauth/authorize?response_type=code&client_id=f3d259ddd3...&state=xyz&redirect_uri=http://huishan-park.dev/cb
用户同意授权后得到code(客户端只能使用该码一次):
http://huishan-park.dev/cb?code=bCafCHij9X99hryqdXgdYPl9CSJKM2VAwRtaV4iJ&state=xyz
2、客户端和认证服务器之间交互,用户不可见
http://huishan-park.dev/cb 页面里CURL POST方式请求:
http://huishan-park.dev/oauth/access_token
body参数(5个):
grant_type,code,redirect_uri,client_id,client_secret
比如:grant_type=authorization_code&code=bCafCHij9X99hryqdXgdYPl9CSJKM2VAwRtaV4iJ&redirect_uri=http://huishan-park.dev/cb&client_id=f3d259ddd3e...&client_secret=4c7f6f8fa93d59c4...
然后即可得到token令牌:
{"access_token":"SdHJaGYKNj3R2Ub5WbvnTvGxMUNPMhSmU9LsgkqZ","token_type":"Bearer","expires_in":3600,"refresh_token":"R3dbWv3mGMXdJdWxmO1hVHEWzTCzkqmA4S7ialBy"}
---------------------------------
【简化模式implicit grant type 】不支持
---------------------------------
【密码模式Password Grant:】
POST
http://huishan-park.dev/oauth/access_token
body参数(5个):
grant_type,client_id,client_secret,username,password
比如:
grant_type=password&client_id=f3d259ddd3ed...&client_secret=4c7f6f8fa93d59c4...&username=test&password=123456
返回:
{
"access_token": "AL7rsmLAdeBHNQvtx4RR1TrjpJG6as0hGKVshCAf",
"token_type": "Bearer",
"expires_in": 3600,
"refresh_token": "6WroaZq4BHLrOBX6BKz7wo4WOQxVO2D2xzcvgAAj"
}
---------------------------------
【客户端模式Client Credentials Grant:】
POST
http://huishan-park.dev/oauth/access_token
body参数(3个):
grant_type,client_id,client_secret
比如:
grant_type=client_credentials&client_id=f3d259ddd3ed8...&client_secret=4c7f6f8fa93d59...
返回:
{
"access_token": "tYhGvC72iA4TKJNKvTqKITKaep4E9CSN5TxOMXpN",
"token_type": "Bearer",
"expires_in": 3600
}
---------------------------------
【更新令牌Refresh Token Grant】(仅和授权码模式以及密码模式配套使用)
POST
http://huishan-park.dev/oauth/access_token
body参数(4个):
grant_type,refresh_token,client_id,client_secret
比如:grant_type=refresh_token&refresh_token=6WroaZq4BHLrOBX6BKz7wo4WOQxVO2D2xzcvgAAj&client_id=f3d259ddd3...&client_secret=4c7f6f8fa93d59c4...
【补充】:
1、阮一峰的理解OAuth 2.0:http://www.ruanyifeng.com/blog/2014/05/oauth_2_0.html
2、RFC 6749:http://www.rfcreader.com/#rfc6749